Understanding the electrical system of a refrigerator is paramount for effective troubleshooting and repair. At the heart of this understanding lies the ability to interpret the schematics that illustrate the interconnections of its various components. These diagrams serve as a visual roadmap, guiding technicians and homeowners alike through the complex network of wires, switches, and devices that keep the appliance functioning correctly. Mastering this skill not only enhances diagnostic capabilities but also promotes safer interaction with electrical appliances, minimizing the risk of electrical hazards.
Proficiency in interpreting these schematics offers significant benefits. It empowers individuals to accurately diagnose electrical faults, leading to more efficient repairs and reduced downtime for the refrigerator. Furthermore, a solid grasp of wiring configurations facilitates the safe and proper installation of replacement parts, ensuring the continued reliable operation of the appliance. The ability to confidently navigate these diagrams can also save substantial costs associated with professional repair services, placing control firmly in the hands of the user.
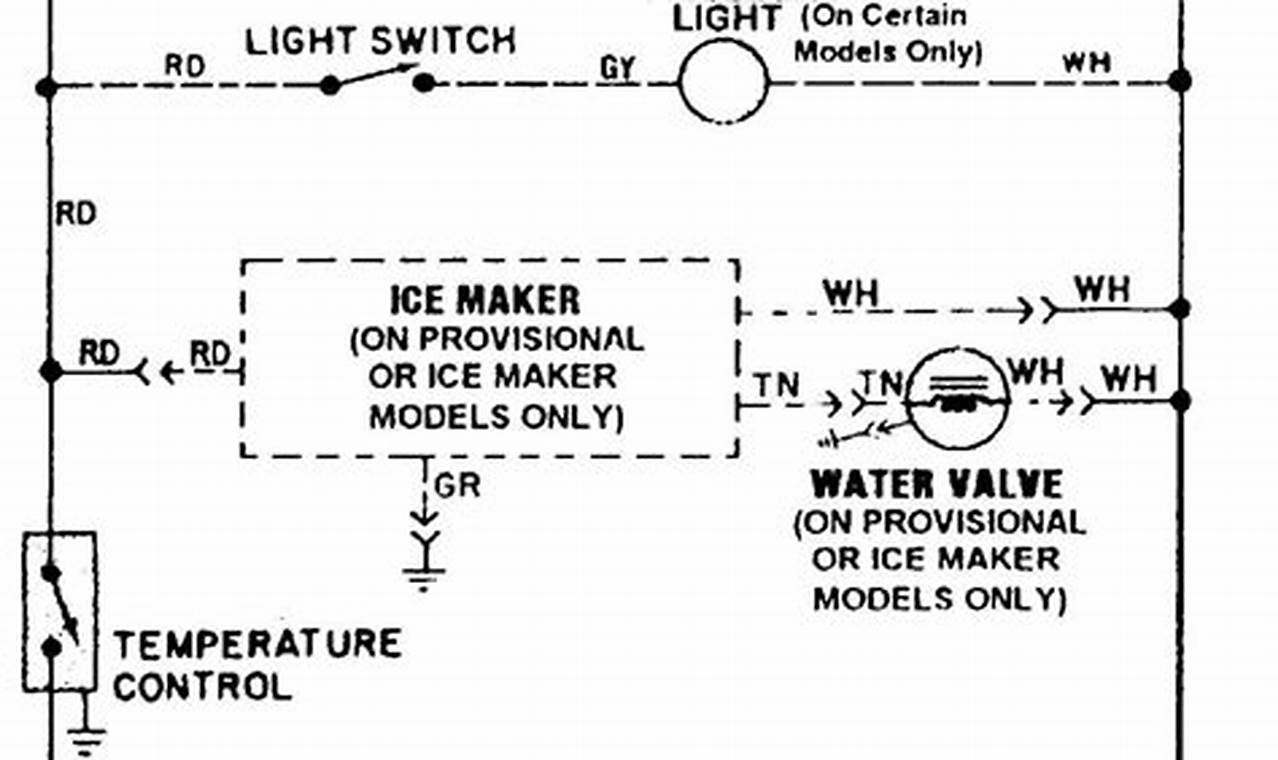
The structure of a refrigerator’s electrical diagram typically follows a logical layout, representing components with standardized symbols. These symbols denote elements such as compressors, defrost heaters, thermostats, and relays. Lines connecting these symbols represent the wiring, with annotations indicating wire colors and connections. The diagram often includes a legend explaining each symbol, along with voltage and current ratings for different circuits. Familiarizing oneself with these standard symbols and the overall format is crucial for accurate interpretation.
Effectively using a refrigerator’s electrical schematic involves a systematic approach. Start by identifying the specific components related to the issue being addressed. Trace the wiring paths associated with that component, paying close attention to any switches, relays, or control boards in the circuit. Use a multimeter to test for continuity and voltage at various points along the circuit, comparing the readings to the values indicated in the diagram. Cross-reference the diagram with the physical layout of the refrigerator’s components to ensure accurate identification. When making repairs, always disconnect the power supply and follow proper safety precautions.
To further enhance comprehension, consider exploring resources that offer detailed explanations of electrical theory and component functionality. Online tutorials and manufacturer service manuals can provide invaluable insights into specific refrigerator models. Practicing with different schematics and tracing circuits will solidify your understanding. Resources such as electrical troubleshooting guides and online forums dedicated to appliance repair can offer practical advice and support. Safety should always be the foremost consideration when working with electrical systems; consulting a qualified electrician is advised when uncertain.
In conclusion, the capacity to decipher a refrigerator’s electrical schematic is an invaluable asset for anyone involved in appliance repair or maintenance. It enhances troubleshooting skills, promotes safer interactions with electrical systems, and empowers individuals to take control of appliance maintenance. Continuously honing these skills and exploring additional resources will further solidify competence and lead to greater confidence in tackling electrical challenges. Explore additional appliance resources and schematics on reputable online platforms to broaden your expertise.
