Understanding the electrical system of a scooter, specifically the ignition system, is crucial for proper maintenance and repair. A thorough understanding of the electrical connections ensures that one can diagnose and resolve issues effectively, preventing potential hazards and maintaining optimal vehicle performance. This knowledge forms the foundation for confident troubleshooting and electrical work.
By mastering the concepts illustrated in a scooter’s electrical schematics, individuals gain the ability to diagnose electrical faults accurately. They can undertake repairs with confidence, ensuring proper functionality and preventing costly trips to the mechanic. Furthermore, the ability to interpret wiring plans allows for customization of the scooter’s electrical system, adding accessories or modifying existing circuits safely and efficiently.
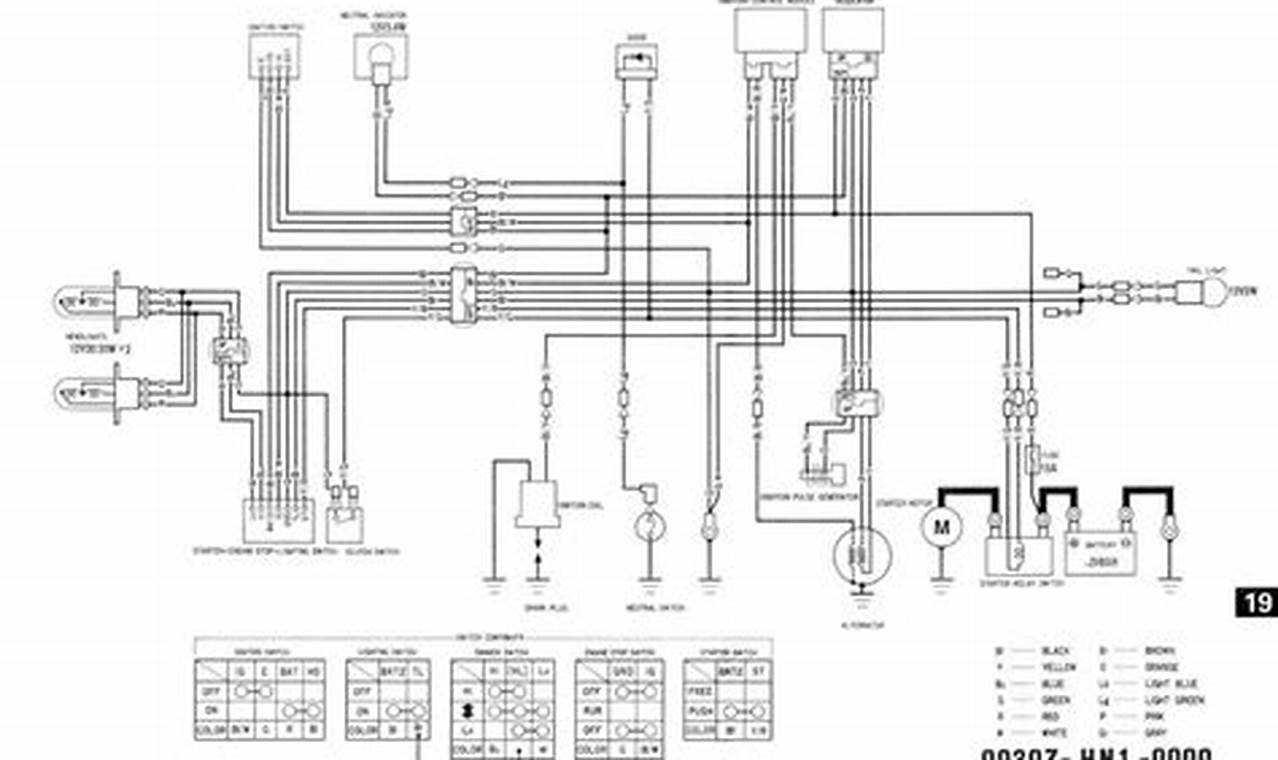
Electrical schematics typically depict components such as the ignition coil, CDI unit (Capacitor Discharge Ignition), spark plug, stator, and wiring harness. The lines represent wires, and standardized symbols denote various electrical parts and connection points. Understanding these symbols and the way components are interconnected is vital for effective interpretation. The schematic illustrates the flow of electrical current and how each part interacts within the ignition circuit.
To effectively interpret and utilize a schematic, begin by identifying the main components of the ignition system. Trace the wiring from the power source (battery or stator) through the ignition switch, CDI unit, ignition coil, and ultimately to the spark plug. Ensure that the wiring matches the schematic and that all connections are secure. Use a multimeter to verify voltage and continuity along the circuit, identifying any breaks or short circuits. This systematic approach allows for precise fault diagnosis and repair.
When working with electrical circuits, always disconnect the battery to prevent accidental short circuits. Use appropriate tools such as wire strippers, crimpers, and multimeters to ensure safe and accurate repairs. Consider referencing other electrical schematics for different scooter models to broaden understanding. Online forums and technical manuals provide valuable resources for troubleshooting and understanding specific scooter electrical systems.
Proficiency in interpreting electrical schematics empowers individuals to maintain and repair their scooters efficiently. This skill promotes safety, saves money on repair costs, and fosters a deeper understanding of electrical systems. Continuing to explore resources and practice reading different schematics will further enhance electrical diagnostic and repair capabilities. Consider exploring more diagrams and educational resources on readwires.com to continue expanding your knowledge.
