The 2010 Honda CRV wiring diagram is an essential resource for anyone undertaking electrical repairs or modifications on their vehicle. This intricate map illustrates the complex network of wires and components that power and control the CRVs various systems. Understanding this diagram is crucial for diagnosing electrical issues accurately and ensuring repairs are done safely and effectively. Without it, tracing circuits, identifying faulty components, and making necessary connections can quickly become a frustrating and potentially damaging process.
The Importance of a Wiring Diagram
The electrical system in a modern vehicle like the 2010 Honda CRV is incredibly sophisticated. It’s responsible for everything from starting the engine and controlling the lights to managing the vehicles various sensors and computer systems. A 2010 Honda CRV wiring diagram provides a detailed visual representation of how these systems are interconnected. It shows the location of components, the routing of wires, and the types of connectors used. This information is invaluable for troubleshooting electrical problems, installing aftermarket accessories, or even understanding how a particular system functions. Attempting electrical work without a diagram is akin to navigating a maze blindfolded youre likely to get lost and potentially cause further damage.
Key Benefits of Using a Wiring Diagram
Using the 2010 Honda CRV wiring diagram offers several key benefits. Firstly, it allows for accurate diagnosis of electrical faults. By tracing circuits and identifying specific components, you can pinpoint the source of the problem quickly and efficiently. Secondly, it aids in the safe and proper installation of aftermarket accessories, such as stereos, alarms, and lighting systems. Ensuring that these additions are wired correctly prevents potential electrical fires or damage to the vehicle’s existing systems. Thirdly, it provides a better understanding of the vehicle’s electrical system as a whole. This knowledge empowers owners to perform basic maintenance and repairs themselves, saving time and money on professional services.
Understanding the Structure of a Wiring Diagram
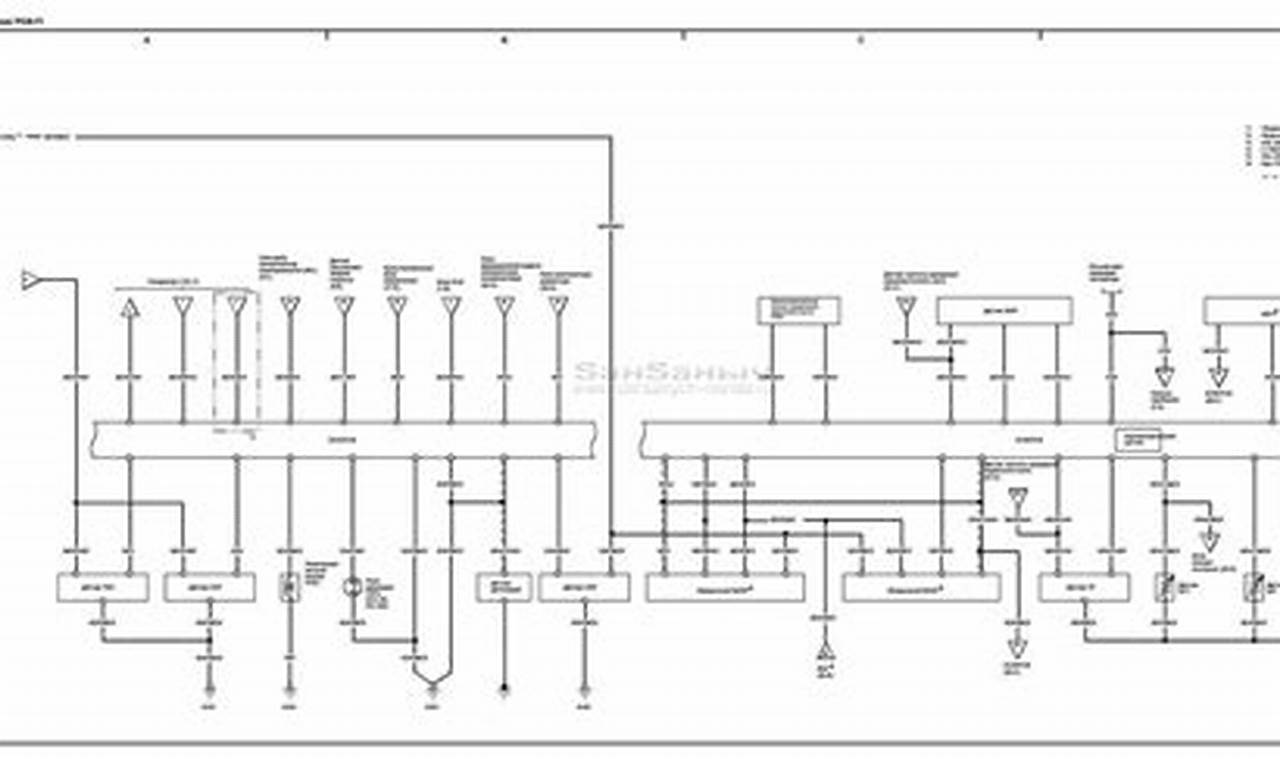
A 2010 Honda CRV wiring diagram may seem daunting at first glance, but it’s designed to be logically organized. Typically, diagrams are divided into sections based on specific vehicle systems, such as the starting system, charging system, lighting system, and so on. Each circuit is represented by lines showing wires, along with symbols denoting various components like fuses, relays, switches, and sensors. Wire colors are often indicated using abbreviations, and connectors are identified with specific codes. Understanding these basic elements is the first step in successfully interpreting the diagram.
How to Read a Wiring Diagram
Reading a 2010 Honda CRV wiring diagram involves a systematic approach. Start by identifying the system you’re interested in. Locate the corresponding section of the diagram and trace the circuit from the power source to the component in question. Pay attention to the wire colors, connector types, and the location of any fuses or relays along the way. If you’re troubleshooting a problem, use a multimeter to test for voltage and continuity at various points in the circuit. This will help you pinpoint the location of a break or short. Remember to always disconnect the battery before working on any electrical components to prevent accidental shocks or damage.
Additional Tips for Working with Wiring Diagrams
When working with a 2010 Honda CRV wiring diagram, it’s helpful to have a high-quality printed copy or a digital version that can be zoomed in on for detail. A multimeter is an essential tool for testing circuits and verifying connections. It’s also advisable to take photos of any connectors or wiring before disconnecting them to ensure proper reassembly. If you’re unsure about any aspect of the diagram or the repair process, consult a qualified automotive electrician. Finally, remember that safety should always be your top priority when working with electrical systems. Disconnect the battery, wear appropriate safety gear, and follow all safety precautions outlined in the vehicle’s service manual.
