Maintaining your 2009 Club Car Precedent’s electrical system is crucial for its performance and longevity. A key component in ensuring proper functionality is understanding the battery wiring. The 2009 Club Car Precedent battery wiring diagram serves as a roadmap for the entire battery system, detailing how each battery is connected, how the charging system integrates, and how the power flows to the various components of your golf cart. Neglecting this wiring can lead to issues like reduced power, charging problems, or even complete electrical failure.
The importance of accurately following the 2009 Club Car Precedent battery wiring diagram cannot be overstated. Proper wiring ensures that your batteries receive the correct charge, maximizing their lifespan and providing consistent power to the motor and other electrical components. Incorrect wiring, on the other hand, can result in overcharging or undercharging, both of which can significantly shorten battery life and potentially damage the batteries or the charger itself. Moreover, correct wiring is essential for safety, preventing short circuits, overheating, and potential fire hazards.
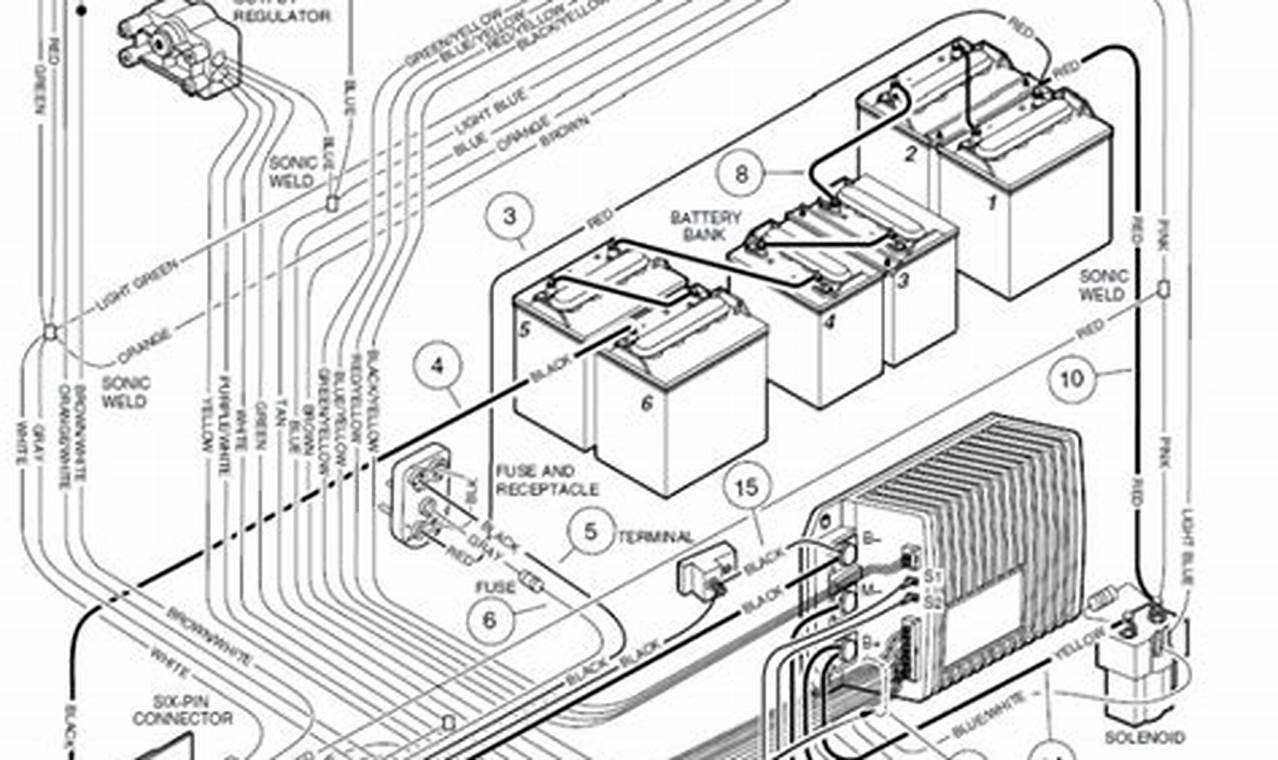
A typical 2009 Club Car Precedent battery wiring diagram illustrates the series and parallel connections of the batteries. It will clearly show how the positive terminal of one battery is connected to the negative terminal of the next, creating a chain that increases the overall voltage of the system. The diagram will also indicate the location of key components such as the main positive and negative cables, the fuse box, the solenoid, and the connection to the motor controller. Understanding these connections is essential for troubleshooting any electrical issues.
Learning to read a 2009 Club Car Precedent battery wiring diagram involves familiarizing yourself with common symbols and conventions. Typically, lines represent wires, circles or rectangles with a + or – sign indicate battery terminals, and various symbols denote fuses, solenoids, and other electrical components. The diagram will also often use color-coding to differentiate between different wire functions, such as positive, negative, and control wires. Pay close attention to the gauge of the wires indicated, as using the wrong gauge can lead to overheating and potential damage.
When working with the 2009 Club Car Precedent battery wiring diagram, there are several tips to keep in mind. First, always disconnect the main battery cable before beginning any electrical work to prevent accidental shorts or shocks. Second, take pictures of the wiring before you disconnect anything, especially if you are unfamiliar with the system. This will provide a visual reference when you are reconnecting the wires. Third, use a multimeter to test for voltage and continuity to ensure that the connections are correct and that there are no breaks in the wiring. Finally, always replace any damaged or corroded wires or connectors to maintain the integrity of the electrical system.
In conclusion, the 2009 Club Car Precedent battery wiring diagram is an indispensable tool for maintaining and troubleshooting the electrical system of your golf cart. Understanding its structure, knowing how to read the symbols, and following best practices for wiring and safety will ensure that your golf cart operates reliably and efficiently for years to come. Regularly inspecting and maintaining the battery wiring is a worthwhile investment that can save you time, money, and potential safety hazards in the long run.
